New Project
The New Project section provides a number of functions for creating a project, either from scratch or from existing project data. From this section, important properties that define a project can be entered before creation.
BLANK
Creates a new, blank project. This is the typical method of creating a project when not basing it on a previous Expert Estimation project.
![]()
New Project window – Blank page
|
FIELD |
DESCRIPTION |
|---|---|
|
Name |
The text entered is displayed as the Project identifier in the Project List, Project Properties, and Title bar. The Project Name must be unique amongst all projects on the connected server. |
|
Tender Number |
The text entered represents the identifier supplied by the client or generated by another system. |
|
Folder |
Clicking the drop-down menu allows for the folder location option to be set if sub-folders have been defined in the database. Otherwise, this defaults to the “root” directory. Note: Folders are created in the Projects window. |
|
Type |
Selecting an option within this drop-down menu allows you to specify the project type. This helps to categorise projects based on their purpose. |
|
Description |
Additional information can be entered to further define the project’s purpose. |
|
Create |
Clicking the Create button will create and open the new Project. |
BASED ON
Allows for the creation of a new project using an existing project. This is useful when performing similar jobs, or as a revision process. Any security privileges applied to the existing project will also be applied to the new project.
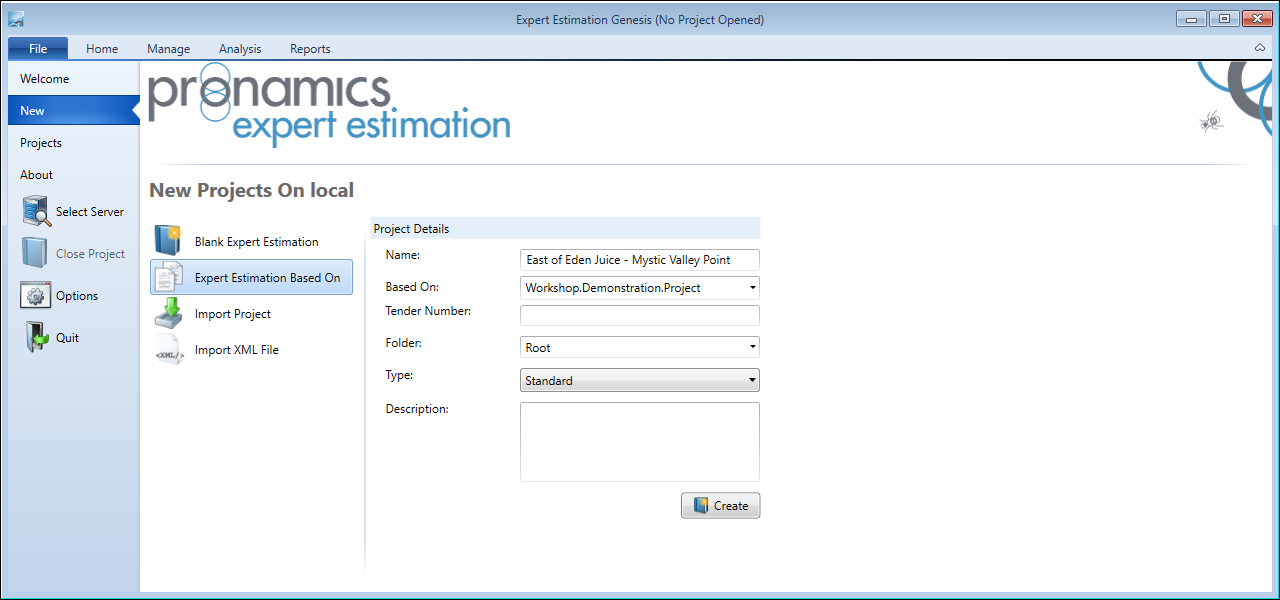
New Project window – Based On page
|
FIELD |
DESCRIPTION |
|---|---|
|
Name |
The text entered is displayed as the Project identifier in the Project List, Project Properties, and Title bar. The Project Name must be unique amongst all projects on the connected server. |
|
Based On |
Clicking the drop-down menu allows you to select the project that will be used as the template for a new project. |
|
Tender Number |
The text entered represents the identifier supplied by the client or generated by another system. |
|
Folder |
Clicking the drop-down menu allows for the folder location option to be set if sub-folders have been defined in the database. Otherwise, this defaults to the “root” directory. Note: Folders are created in the Projects window. |
|
Type |
Selecting an option within this drop-down menu allows you to specify the project type. This helps to categorise projects based on their purpose. |
|
Description |
Additional information can be entered to further define the project’s purpose. |
|
Create |
Clicking the Create button will create and open the new Project. |
IMPORT PROJECT
Allows you to import previous Expert Estimation 2014 projects or exported projects from Expert Estimation.
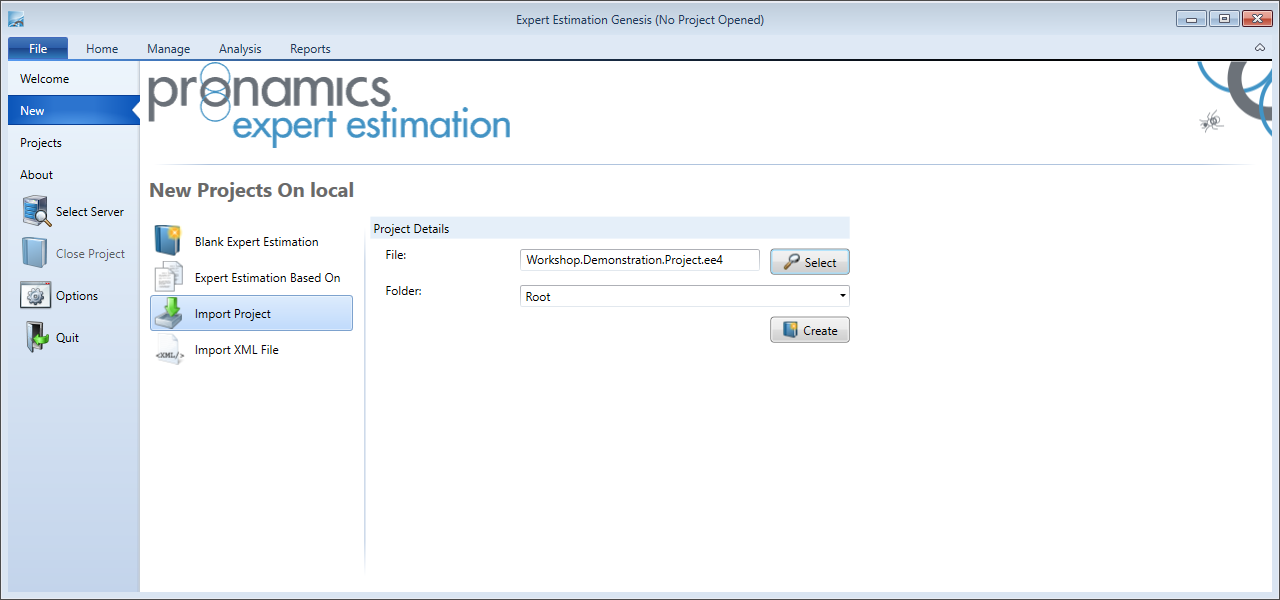
New Project window – Import Project page
|
OPTION |
DESCRIPTION |
|---|---|
|
File |
Identifies the project to be imported. This can be set by clicking the Select button. |
|
Select |
Clicking the Select button opens a File Explorer window. From this window browse to the project location, select and open the project. Projects are identified by the either “.EE3” or “.EE4” file extensions. |
|
Folder |
Clicking the drop-down menu allows for the folder location option to be set if sub-folders have been defined in the database. Otherwise, this defaults to the “root” directory. Note: Folders are created in the Projects window. |
|
Create |
Clicking the Create button will create and open the new Project. |
Any issues identified during import will be displayed in a pop-up message in the bottom right of the window.
Sometimes, when importing a project, not all features will be available. In this case, a window will be displayed detailing the parts of the project that will be affected.
IMPORT XML FILE
Imports a project from third-party application export providing it is in an XML format seperated into Direct and Overhead Cost files.
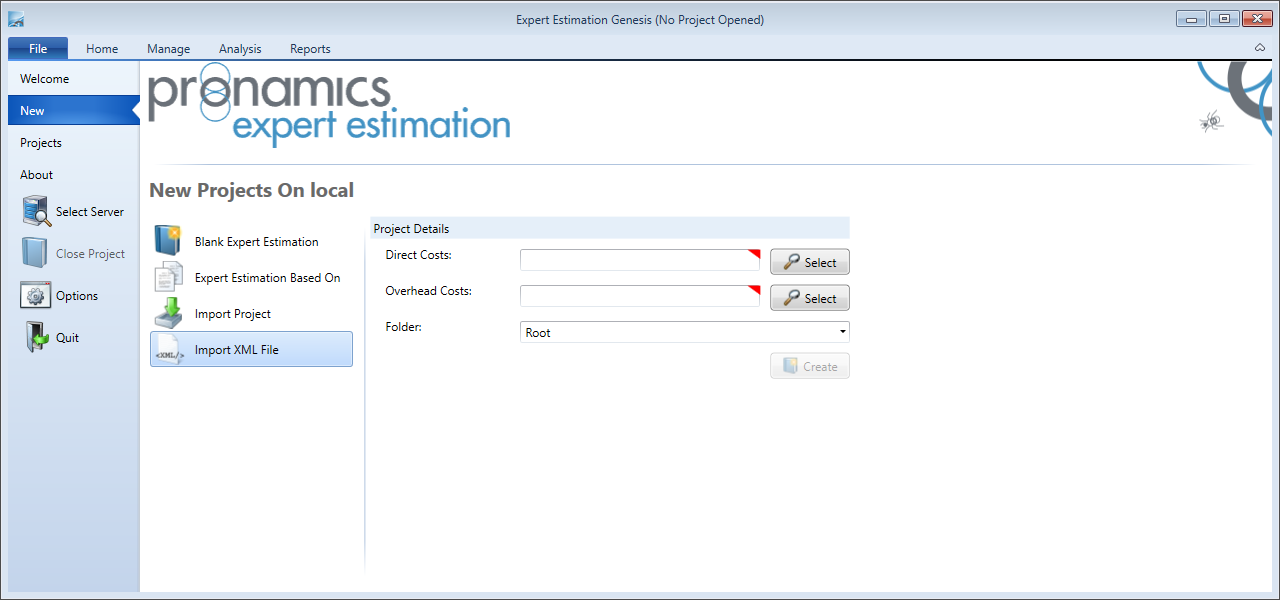
New Project window – Import XML File page
|
OPTION |
DESCRIPTION |
|---|---|
|
Direct Costs |
Identifies the Direct Costs XML file that will be imported. This can be set by clicking the Direct Costs Select button. Direct Costs will be identified by a “.xml” file extension. |
|
Overhead Costs |
Identifies the Overhead Costs XML file that will be imported. This can be set by clicking the Select button. Overhead Costs will be identified by a “.xml” file extension. |
|
Folder |
Clicking the drop-down menu allows for the folder location option to be set if sub-folders have been defined in the database. Otherwise, this defaults to the “root” directory. Note: Folders are created in the Projects window. |
|
Create |
Clicking the Create button will create and open the new Project. |
Any issues identified during import will be displayed in a pop-up message in the bottom right of the window.